What is GiveBack?
Remember those school fundraisers where you sold candy bars or wrapping paper? They worked because you instantly had a motivated sales team. GiveBack brings that same energy to your Shopify store.
GiveBack turns your customers into advocates by letting them support causes they care about with every purchase. When your recipients share their fundraising links, they become an extension of your sales team—driving traffic and sales while raising money for their cause.
Set Your Timeline
Choose when your campaign runs
Pick Your Products
Select which items are eligible
Add Recipients
Choose who receives donations
Good to know
GiveBack tracks donations and provides detailed reports, but you handle the actual fund distribution to recipients. This gives you full control over timing and payment methods.
1 Add GiveBack to Your Checkout
RequiredThis is where GiveBack appears after purchase so shoppers can complete recipient selection when your campaign uses Option List or Custom Code.
Quick Summary
- 1. Go to Settings → Checkout → Customize
- 2. Navigate to your Thank You page
- 3. Click Add App Block and select GiveBack
- 4. Repeat for the Order Status page
- 5. Save your changes
Why both pages?
The Thank You page only appears once. If customers refresh or return later, they'll see the Order Status page instead. Adding GiveBack to both ensures post-purchase recipient selection is still available when your campaign uses Option List or Custom Code.
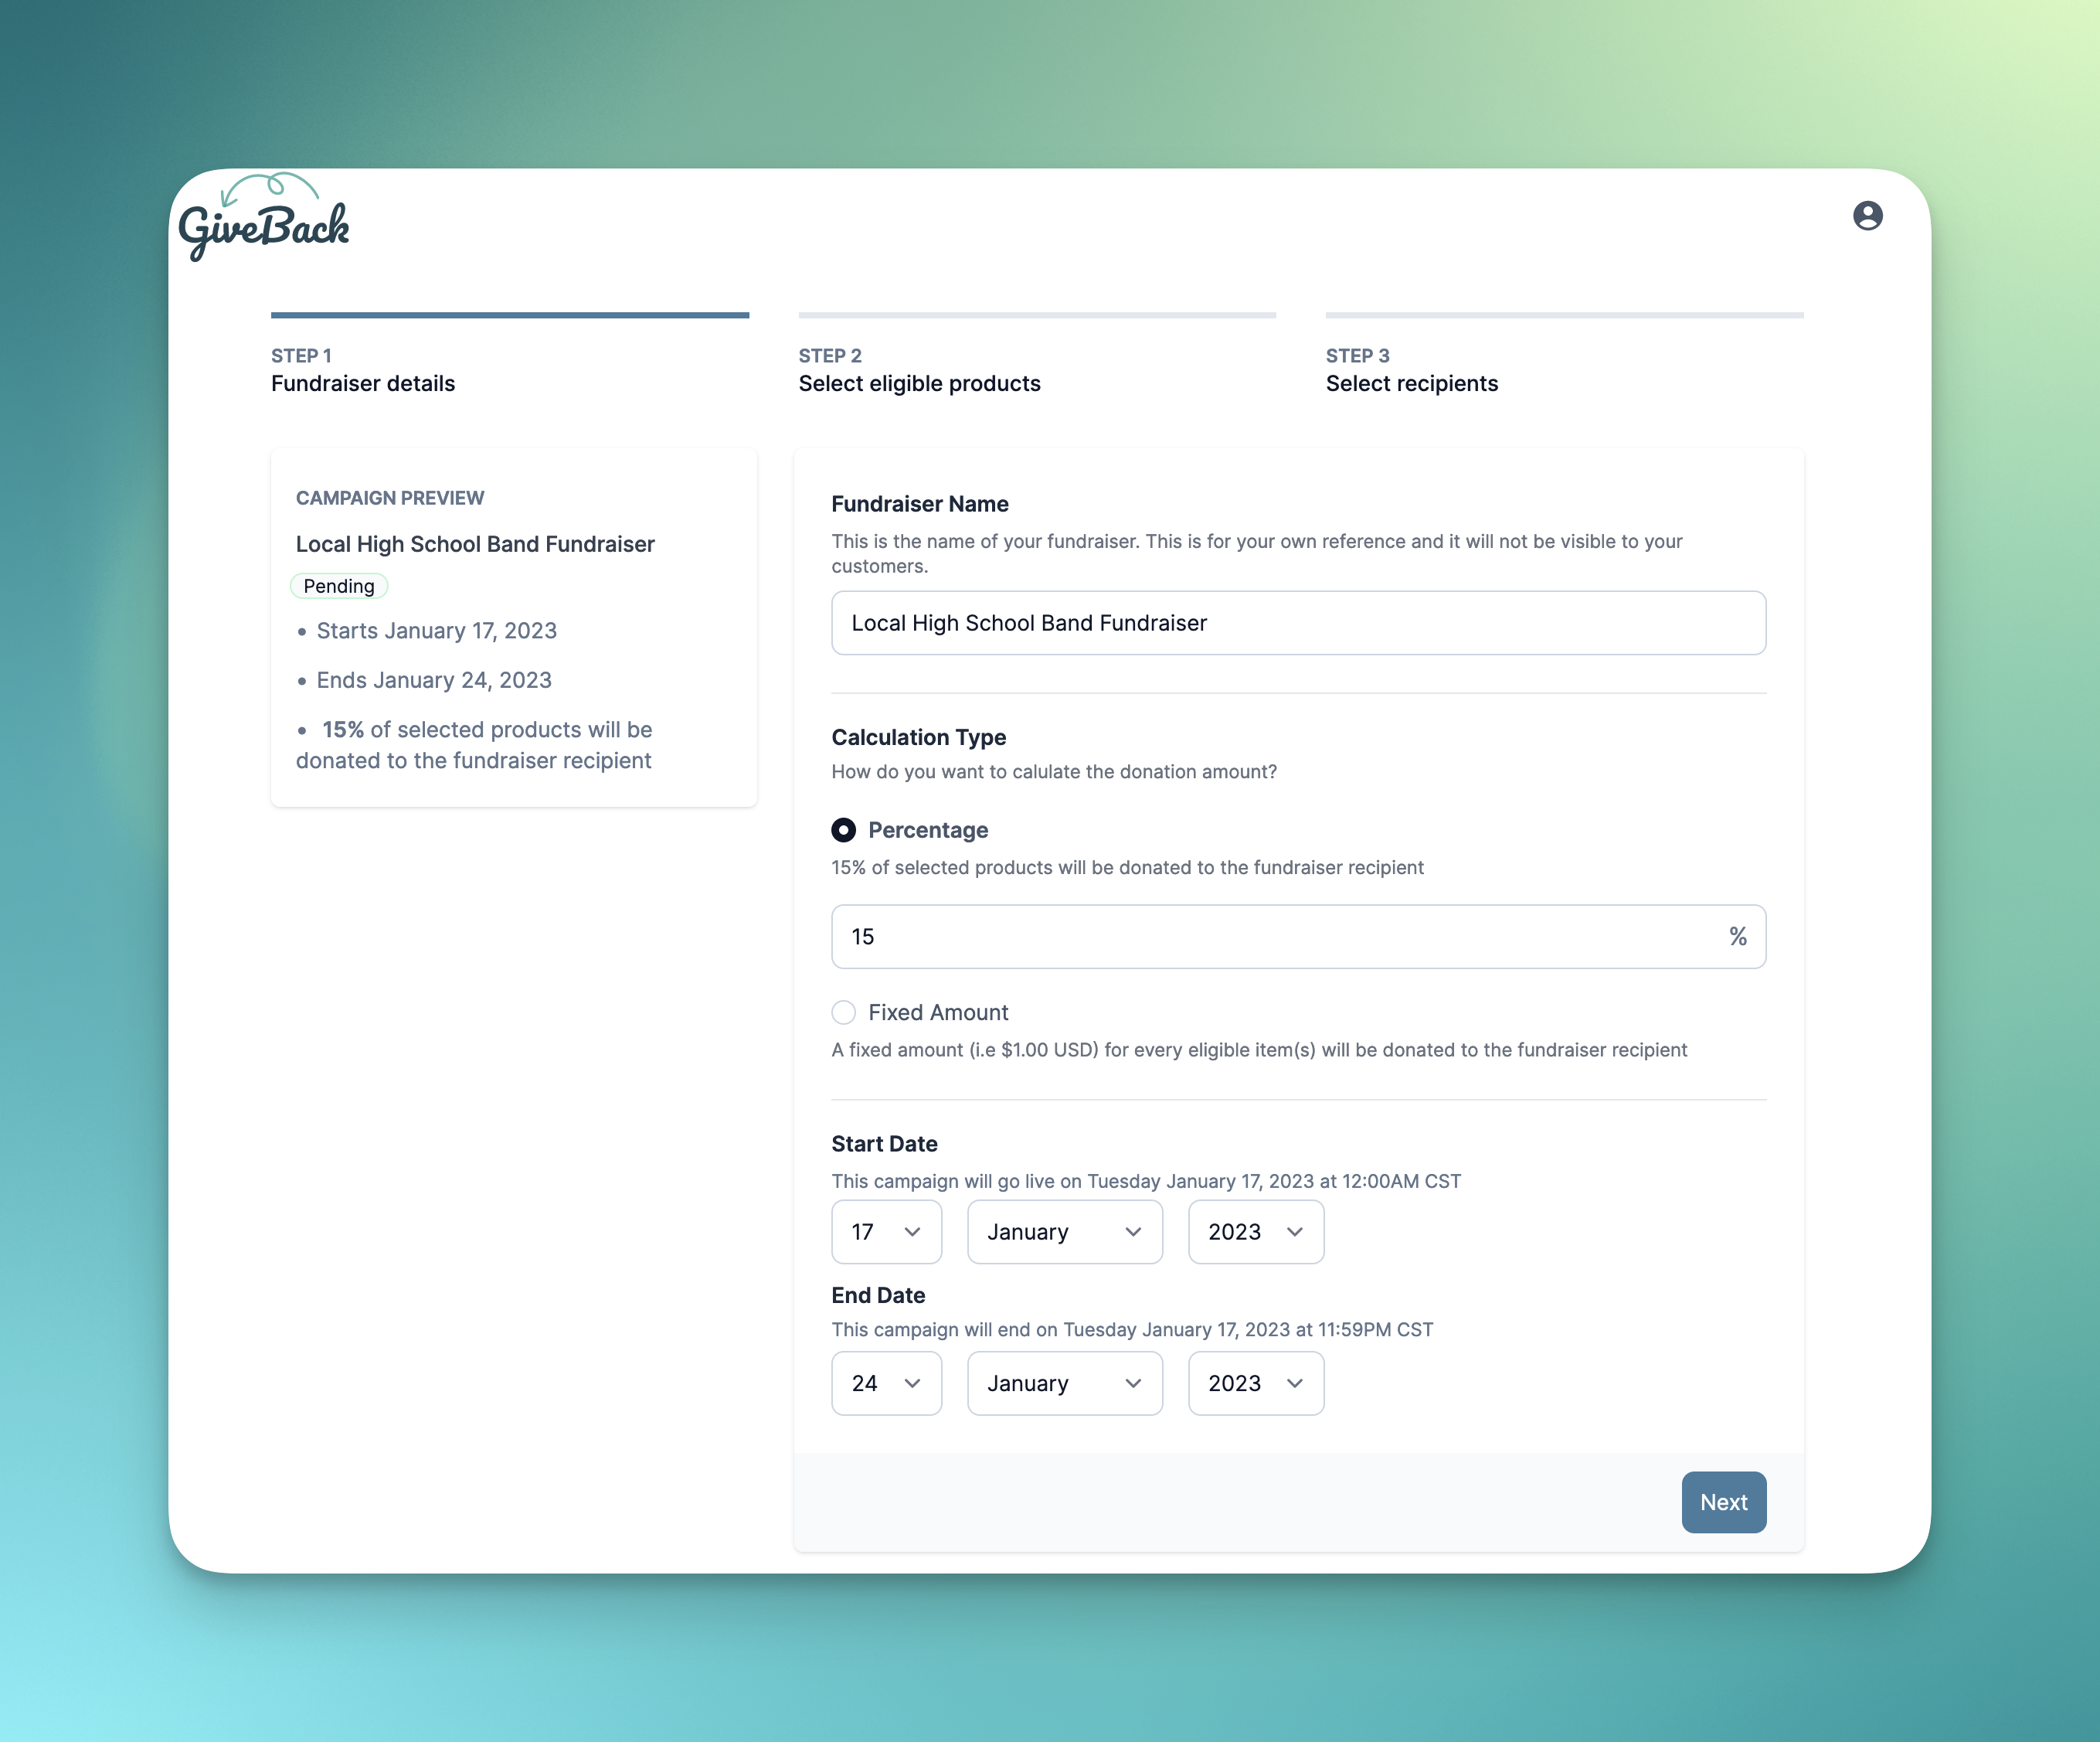
3 Create Your Campaign
Set up your fundraiser in just a few minutes.
Every campaign needs three things:
Start and end dates for your fundraiser
Which products are eligible
Your fundraising recipients
You'll also choose your donation amount—either a fixed amount per item (e.g., $2 per product) or a percentage of the sale (e.g., 10% of eligible products).
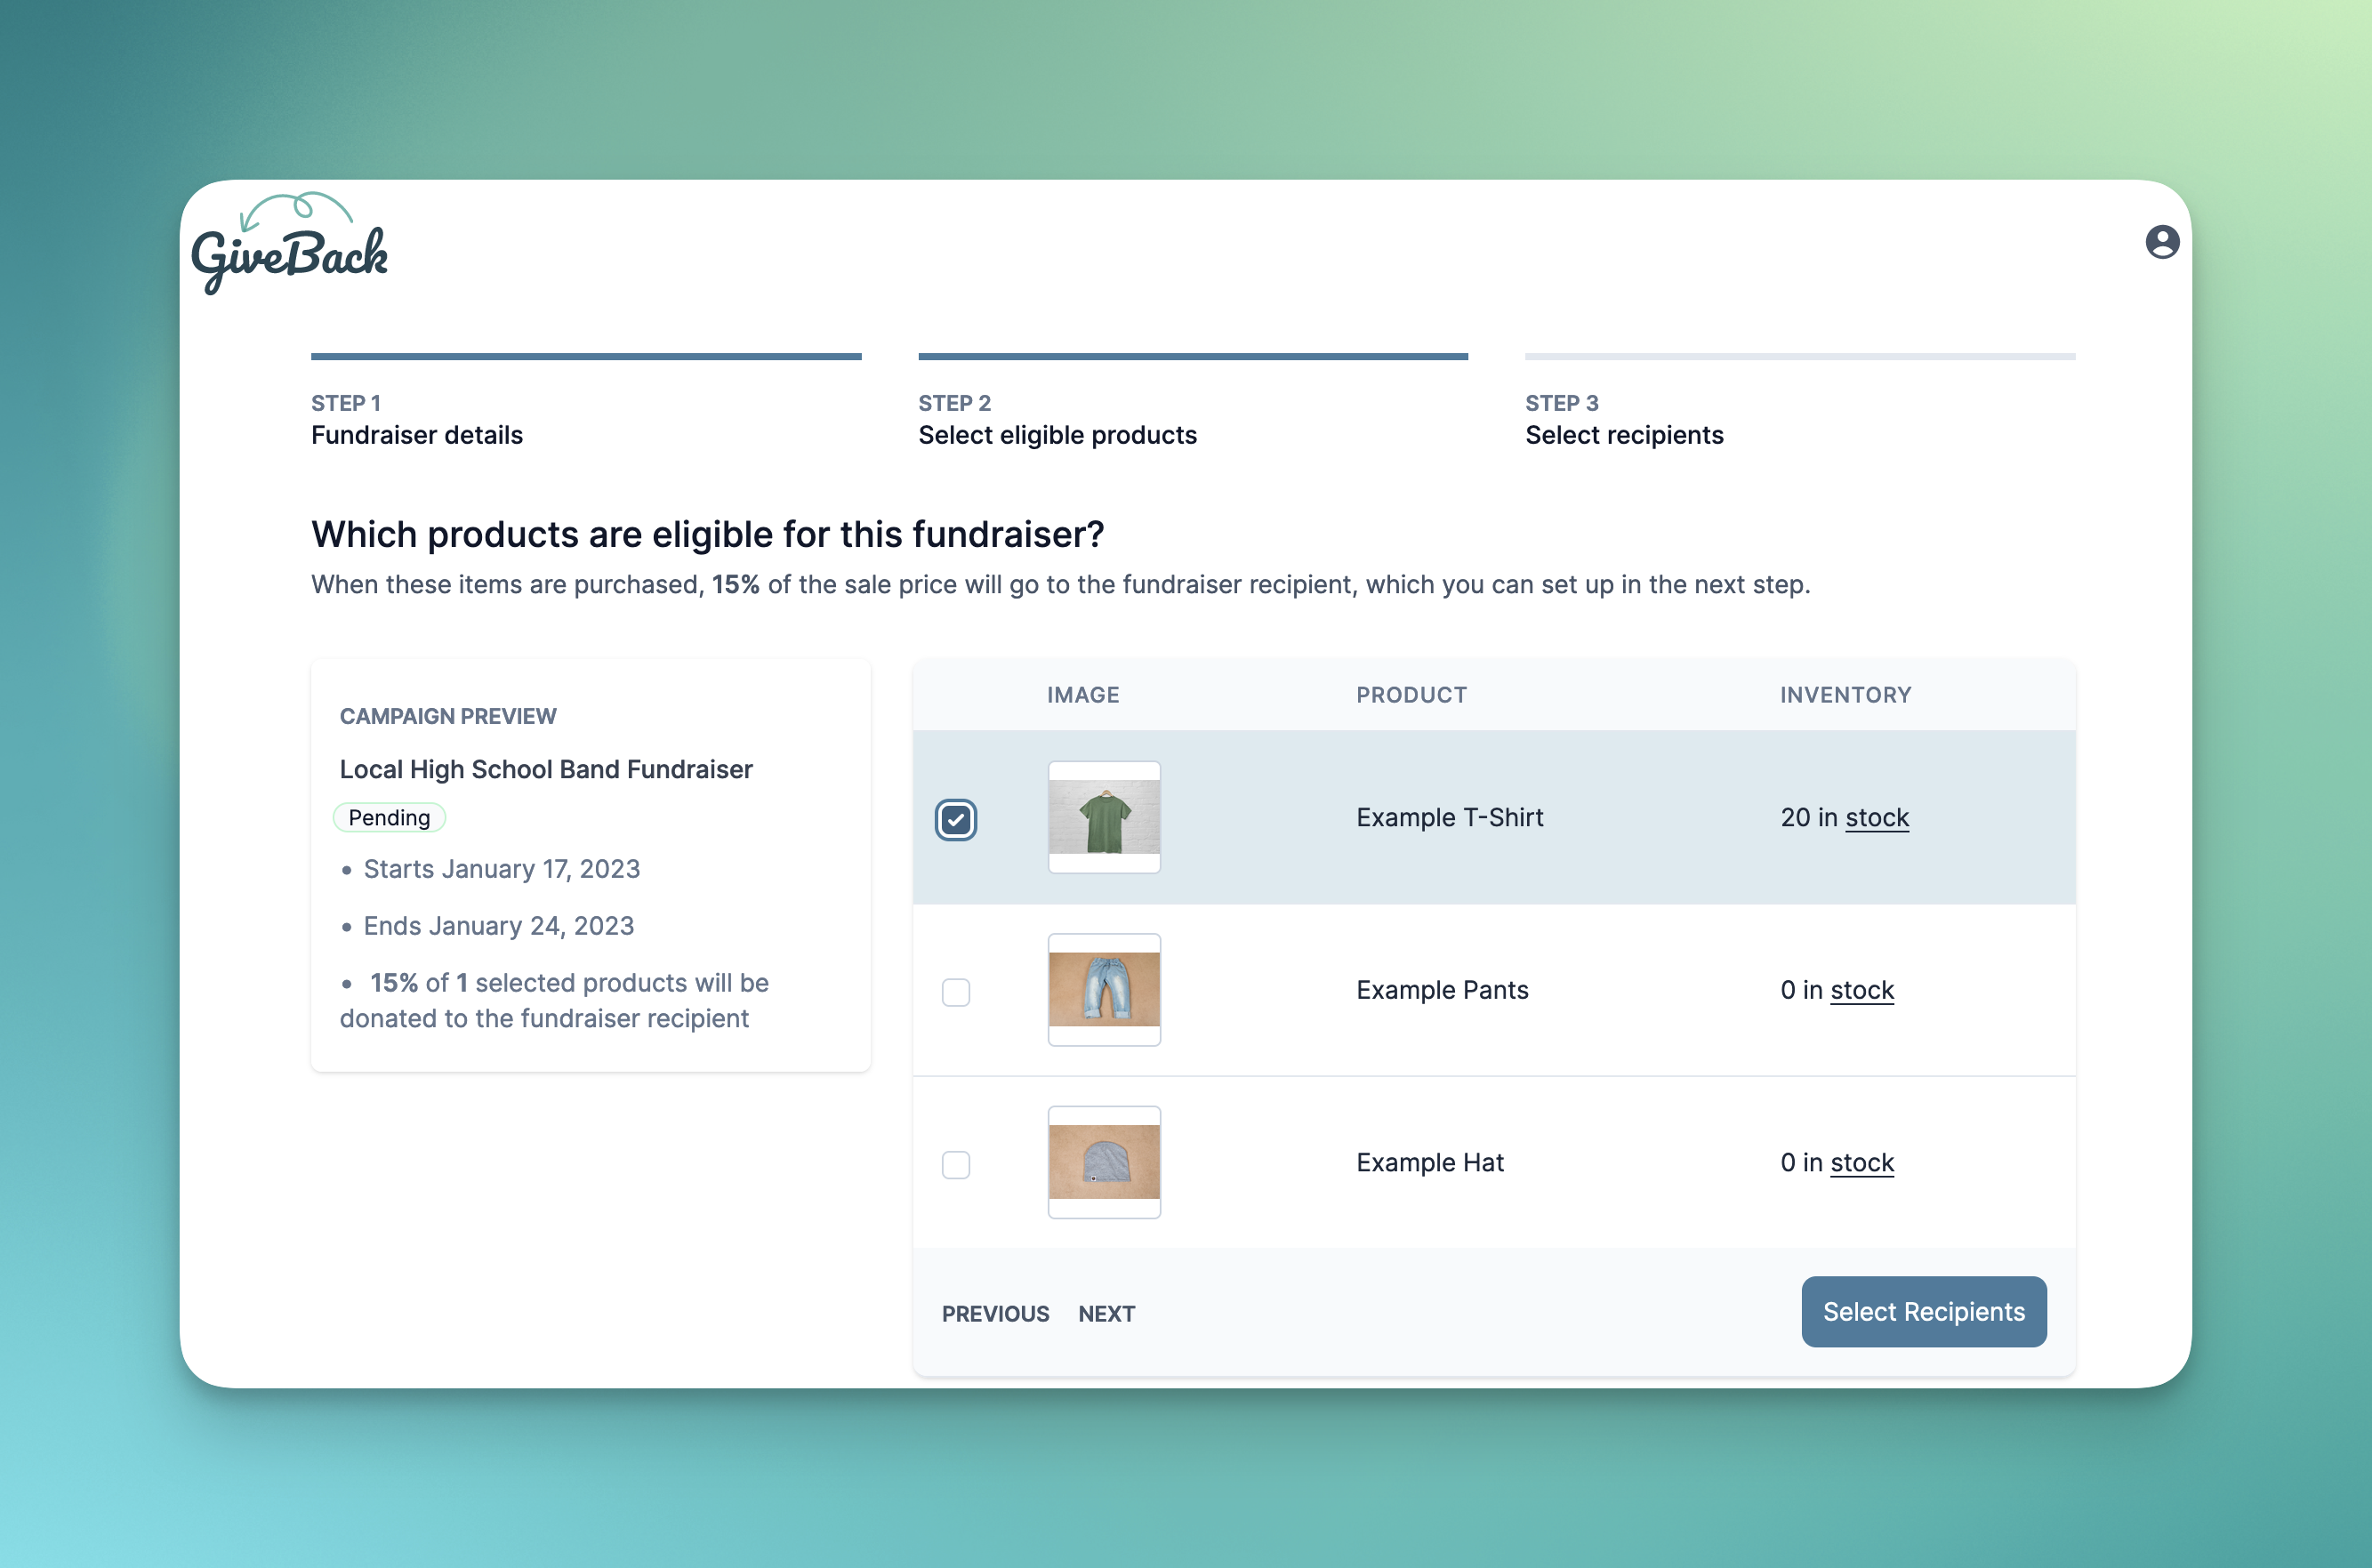
4 Select Eligible Products
Choose which products contribute to your fundraiser.
You have two options for selecting products:
Automatically include all products with a specific tag. Great for ongoing campaigns—new products get included automatically.
Hand-pick exactly which products to include. Perfect when you want precise control over your campaign.
5 Add Fundraising Recipients
Set up the organizations or causes that will receive donations, and decide how shoppers get matched to them.
First, choose how customers will select their recipient:
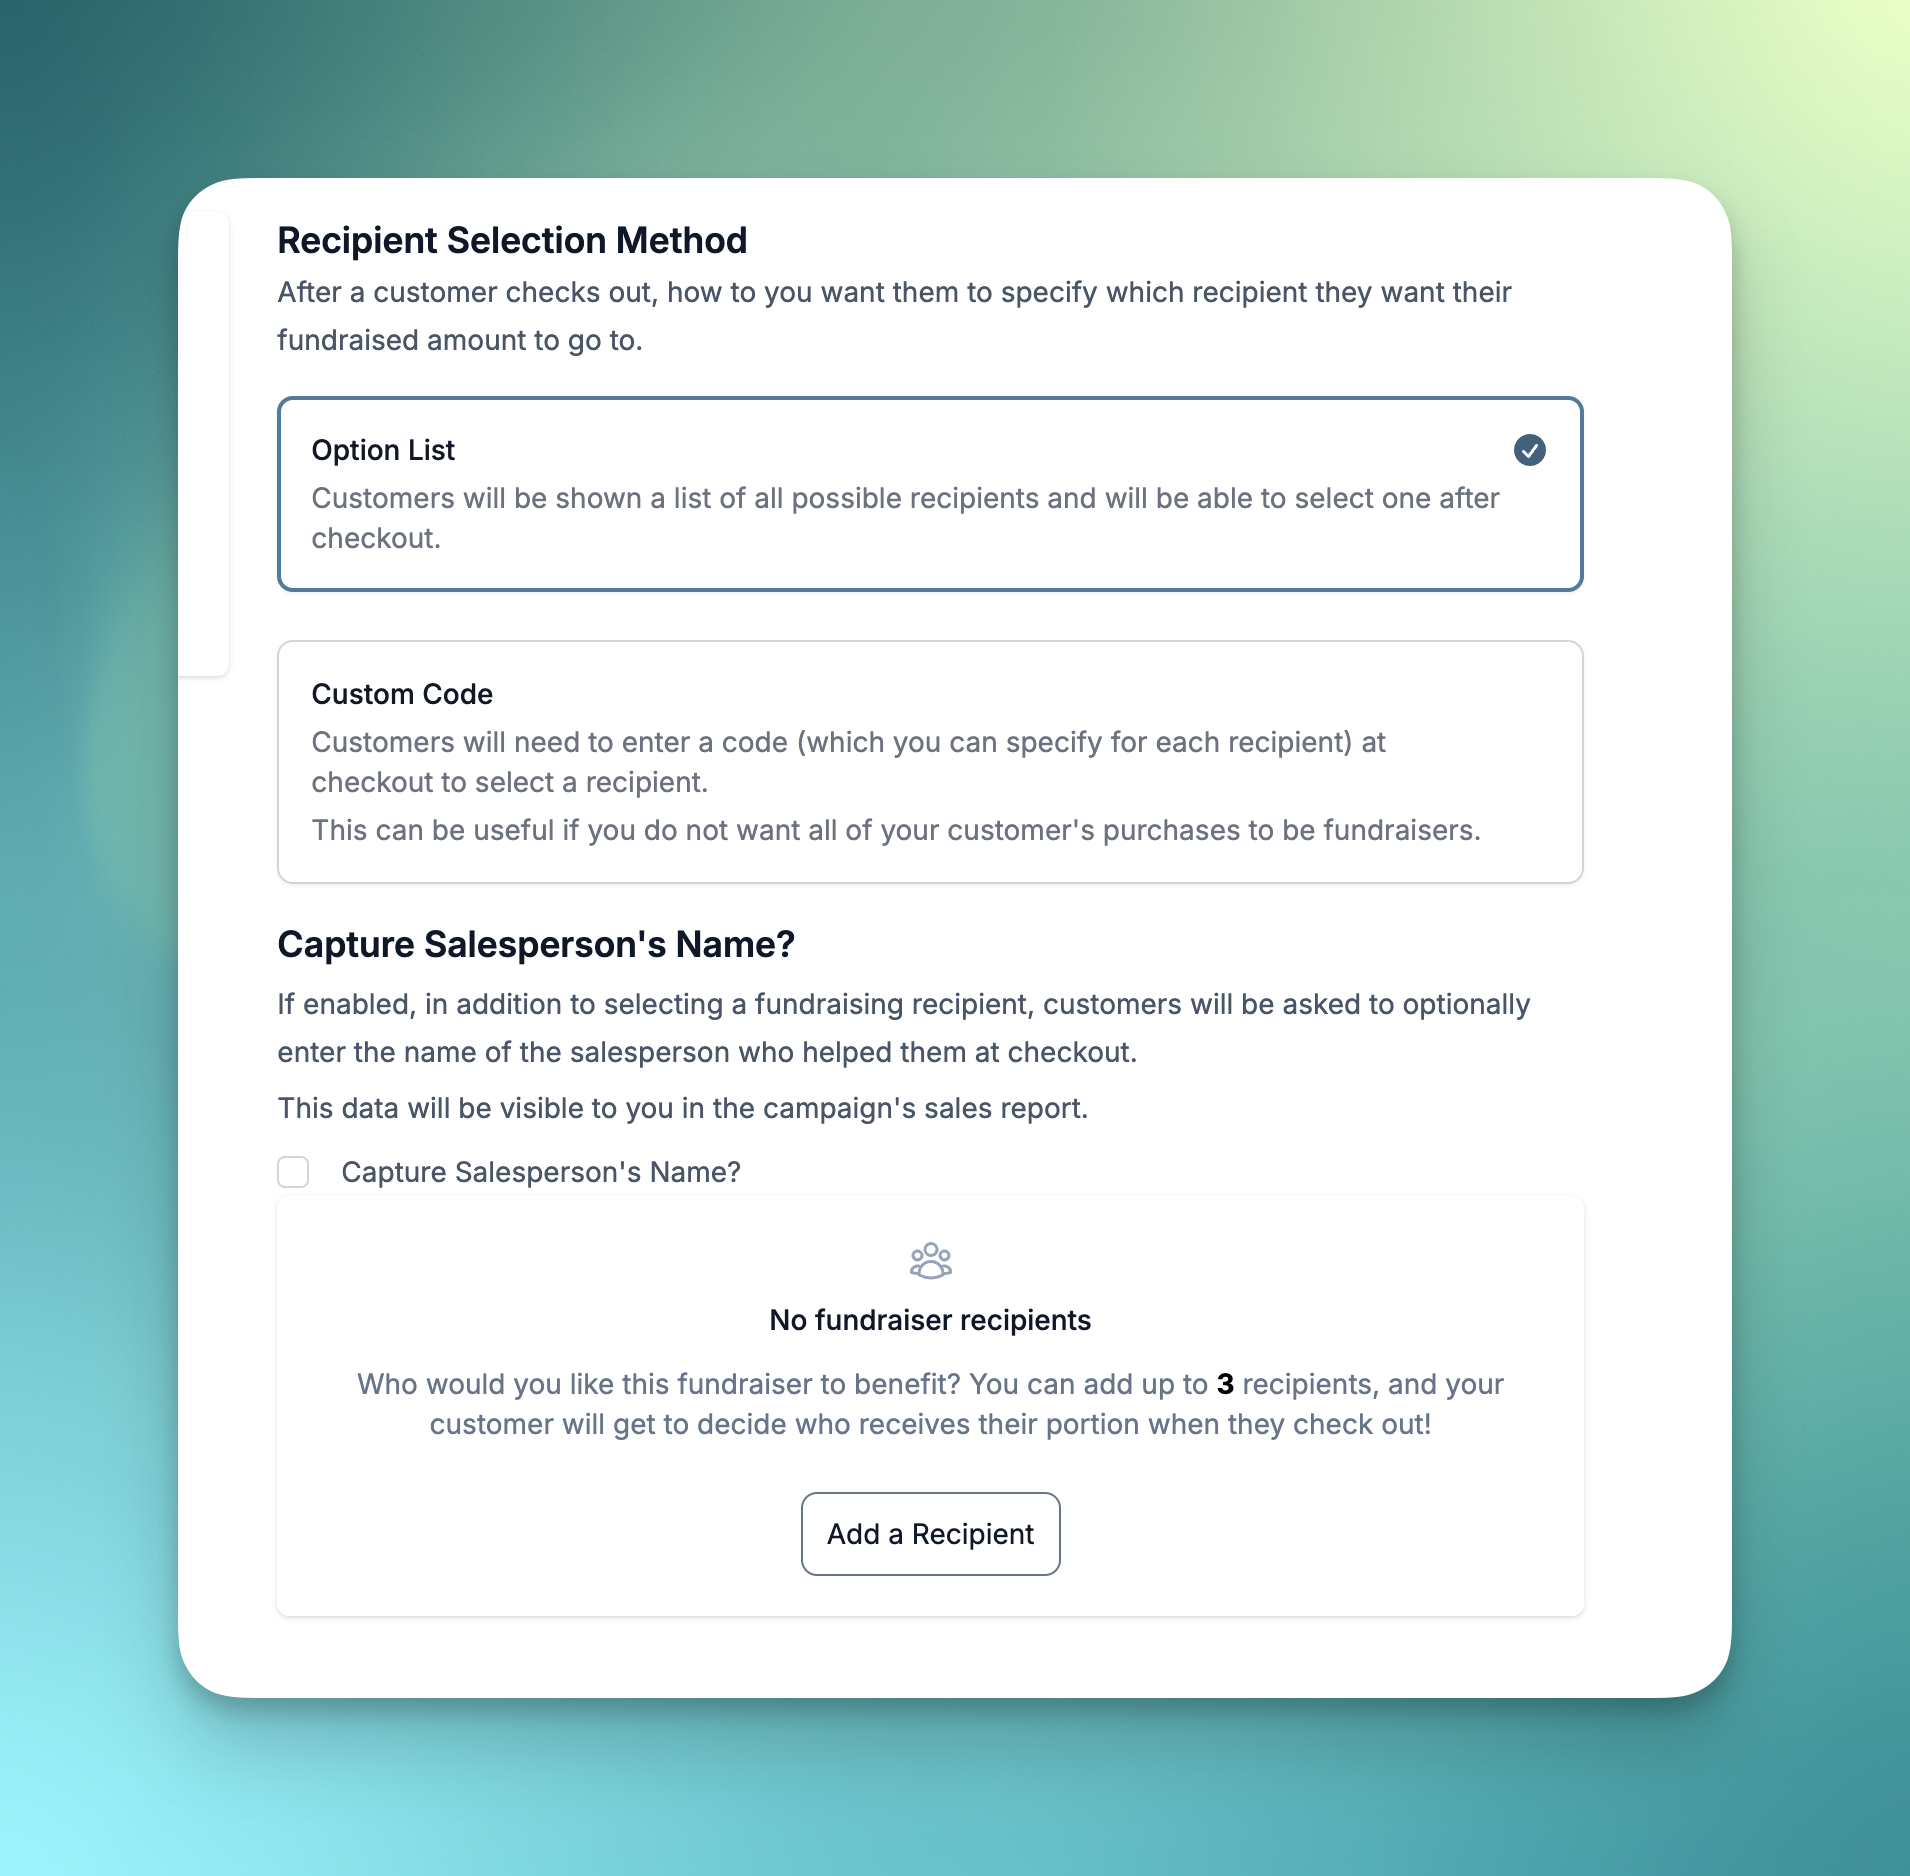
Customers see all recipients and pick their favorite. Great for public campaigns with multiple organizations, but every shopper will see the list, so a regular customer can still credit a recipient even if they were not referred by them.
Customers enter a code to support a specific recipient. Perfect for private fundraisers or tracking referrals.
Each recipient gets a shareable URL and QR code. When a shopper starts from that link or scans that code, GiveBack can automatically credit the correct recipient.
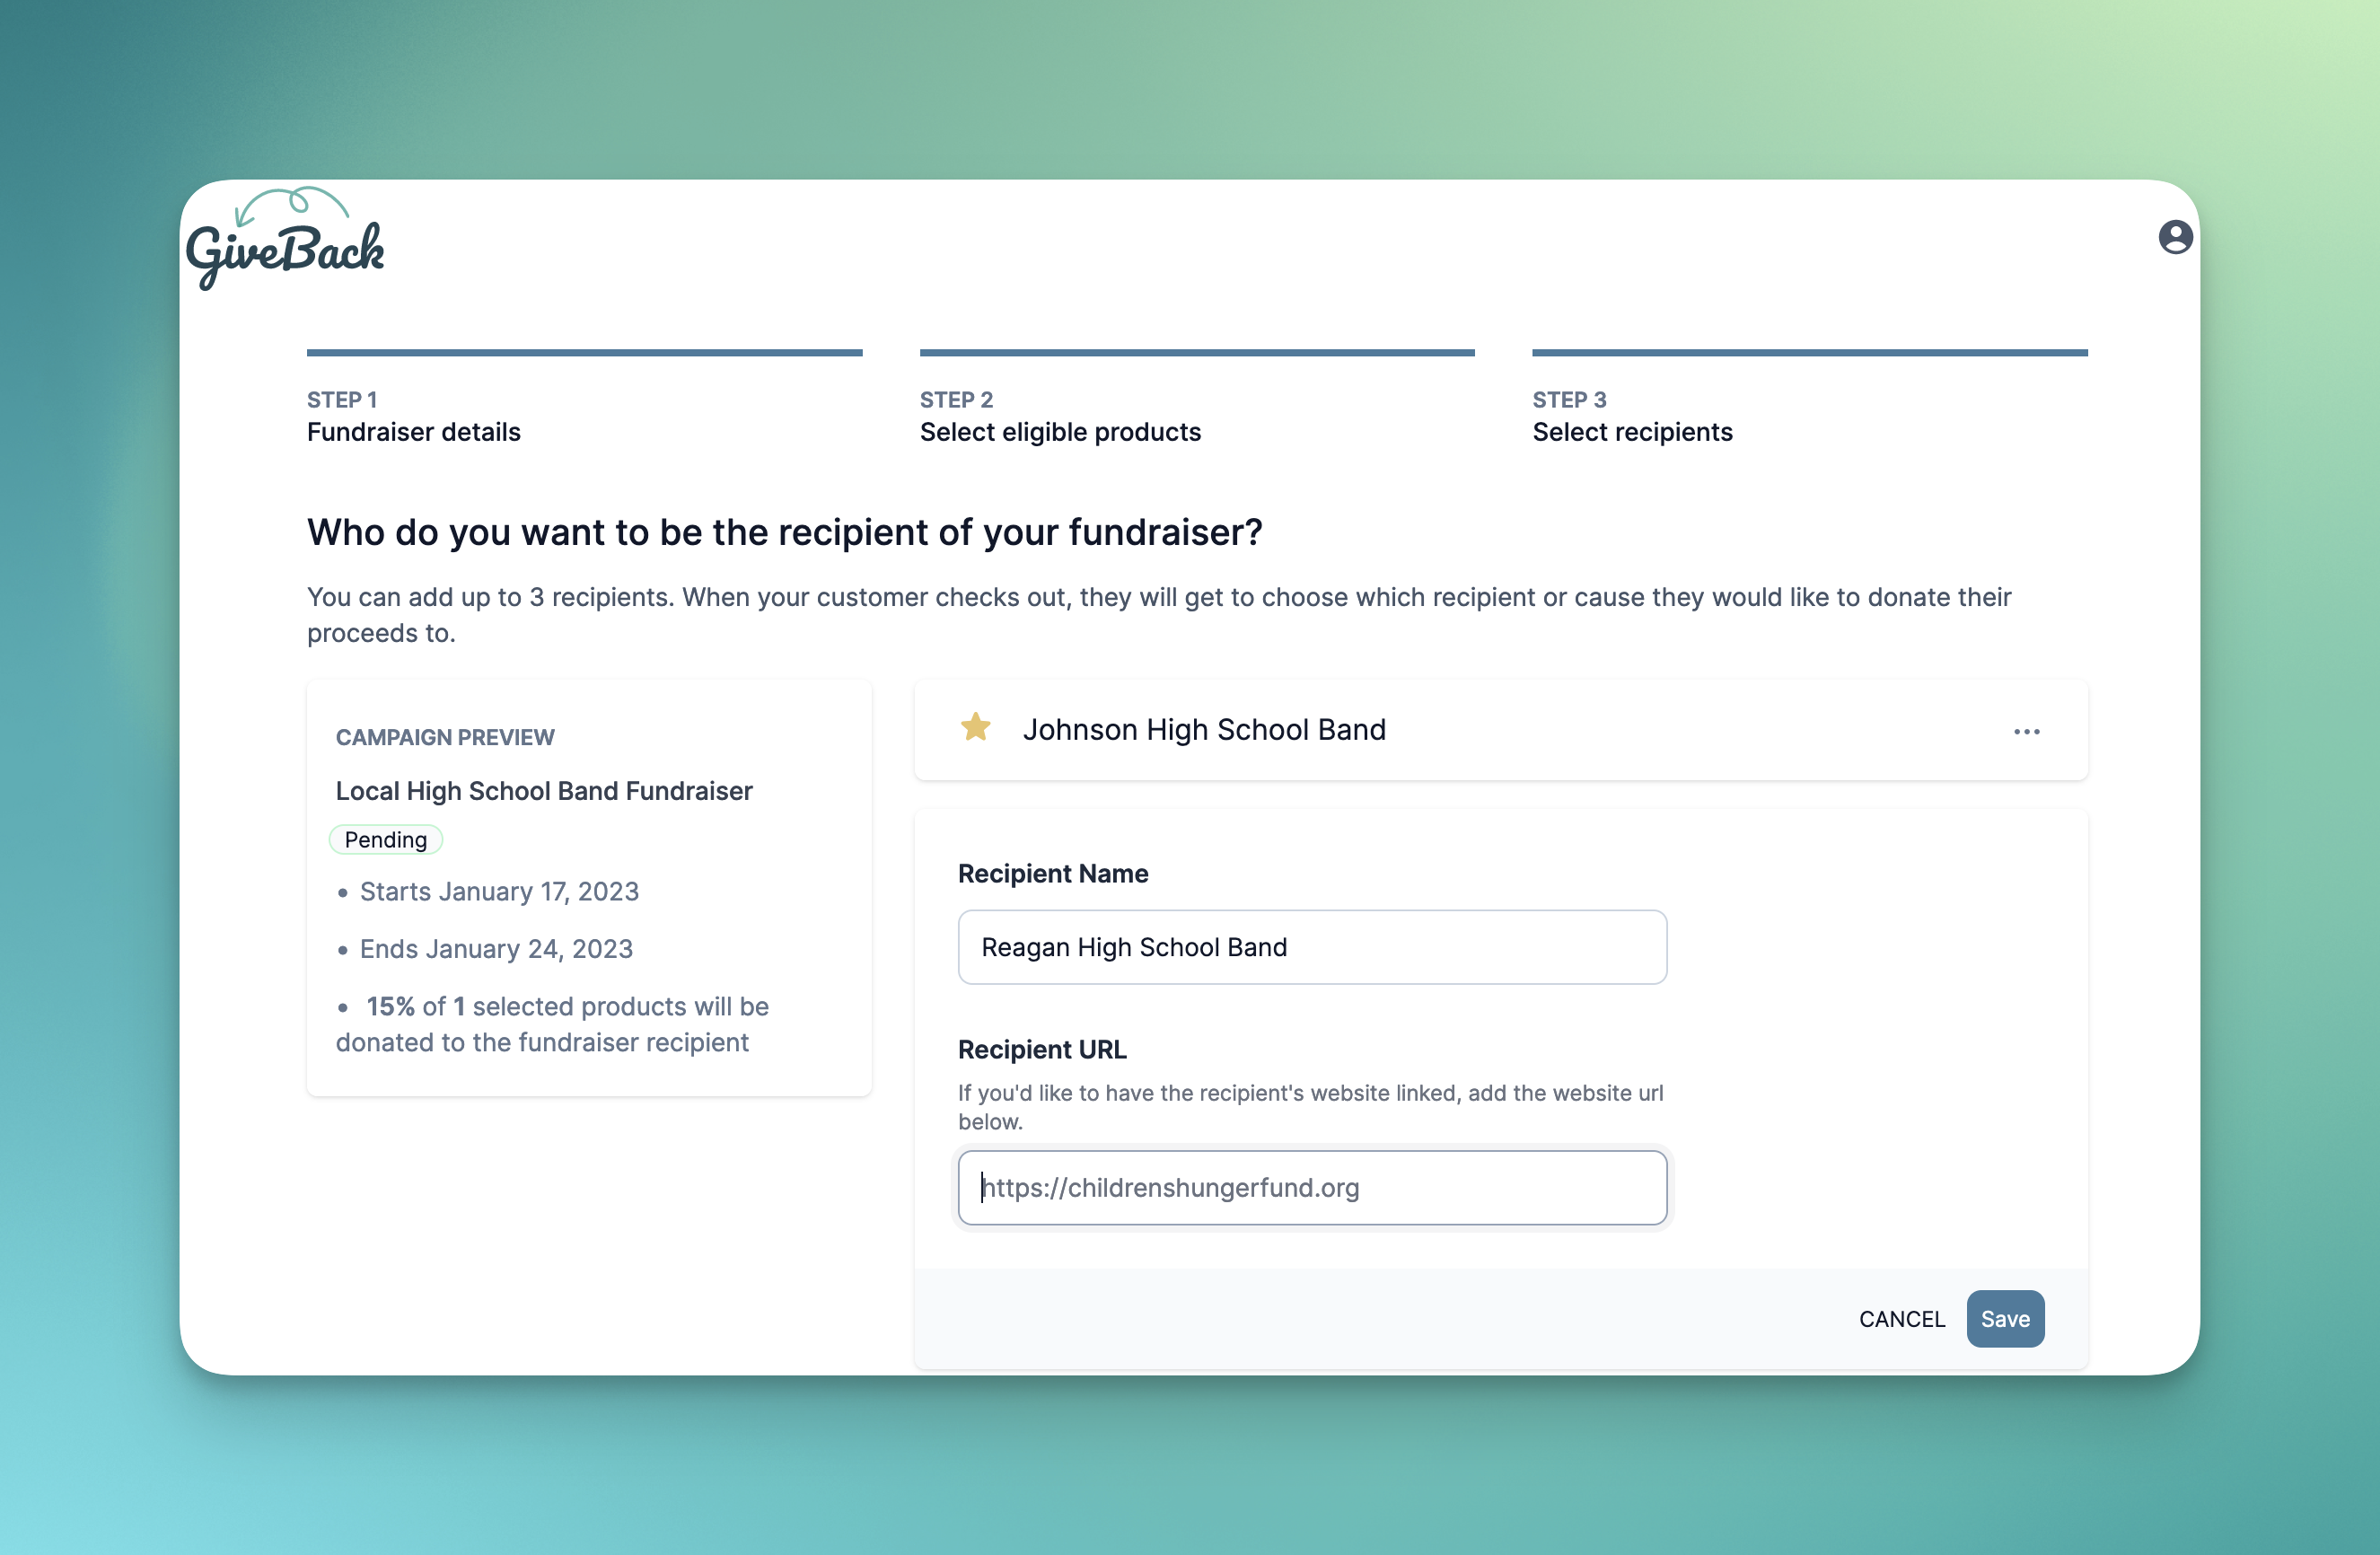
Then add your recipients. Depending on your plan, you can have up to 3 or 50 recipients per campaign.
The Power of Multiple Recipients
Adding multiple recipients creates friendly competition and increases engagement. Each recipient becomes motivated to share your store with their community, expanding your reach while raising more funds.
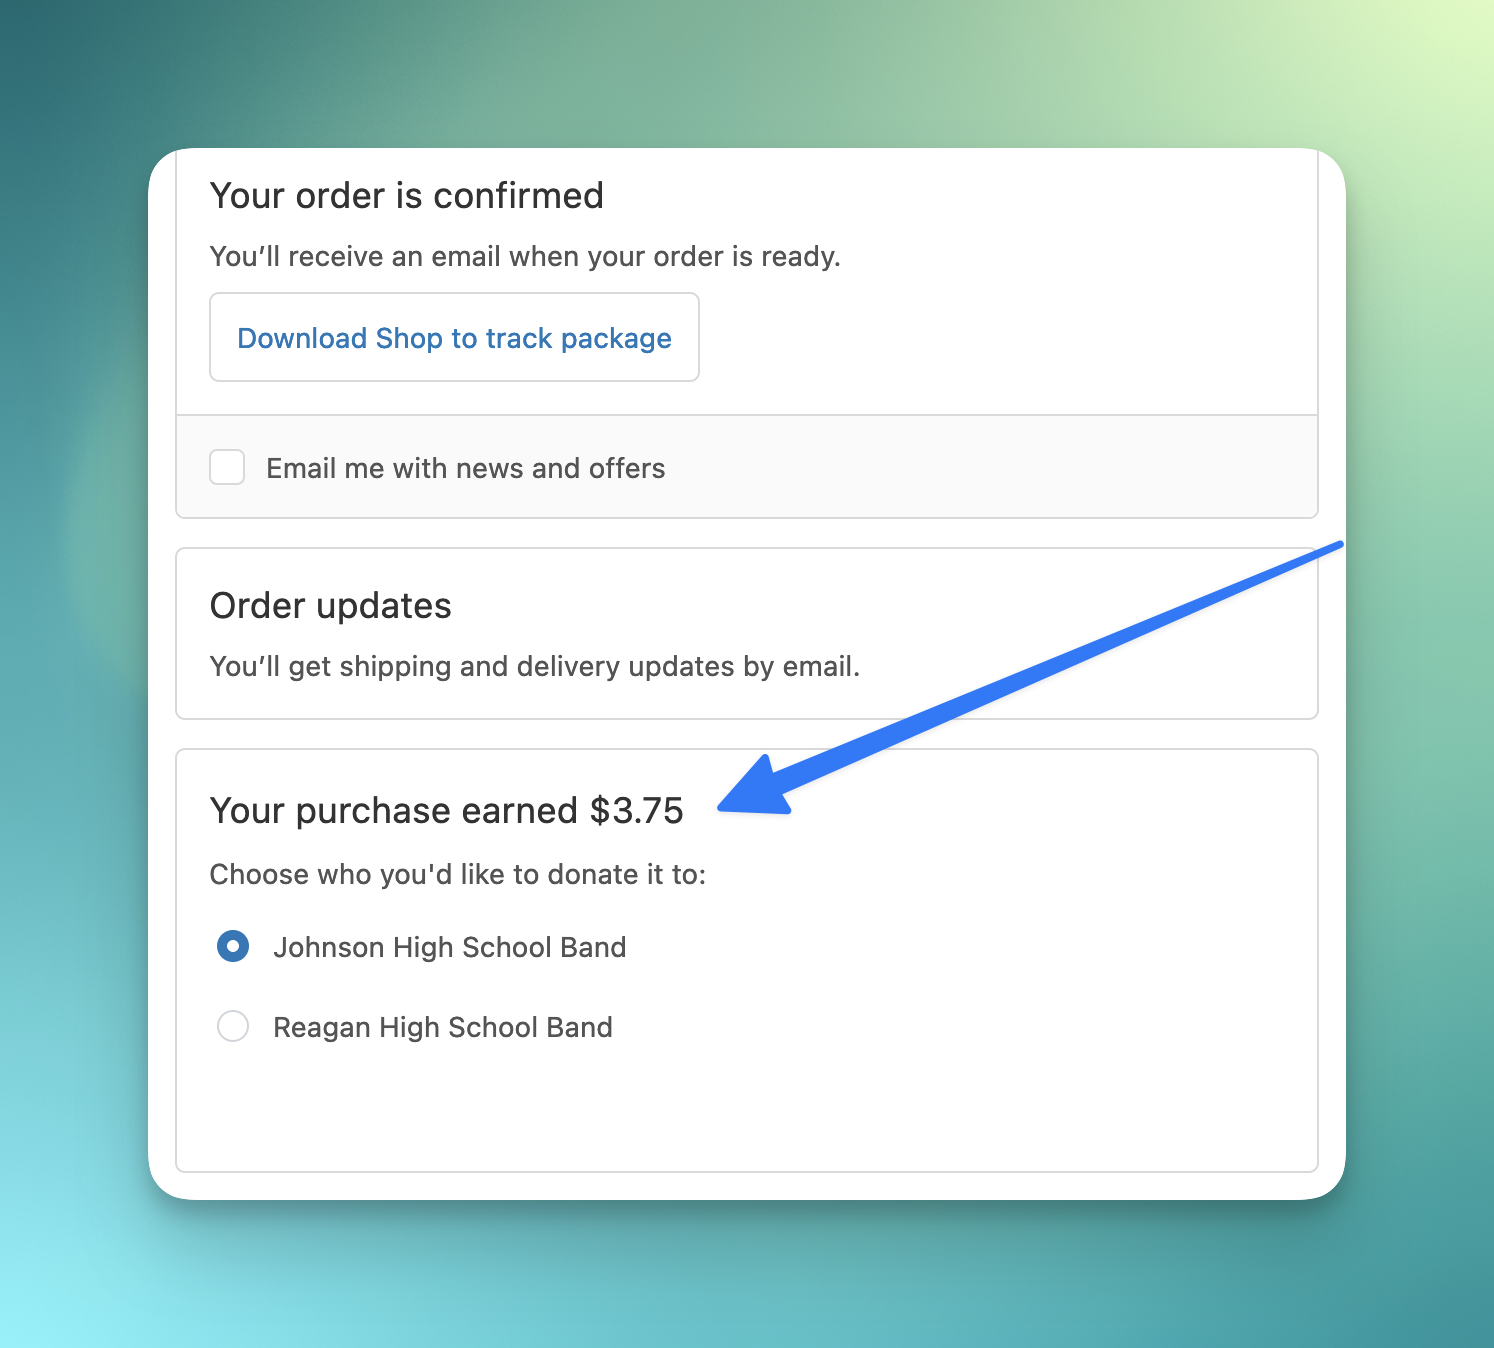
When customers have multiple recipients to choose from, they see a selection interface after checkout.
QR code recipients
If you choose URL / QR Code, GiveBack adds campaign-level controls for how those links behave.
-
Set a QR Code Destination Path so scans land on a specific product, collection, or page in your store.
-
Choose a secondary selection method for shoppers who do not start from the QR code or shareable URL. You can use no fallback, an option list, or custom codes.
-
Share each recipient's unique URL or downloadable QR code so supporters can send traffic directly to the right fundraiser.
Custom landing pages
For URL / QR Code campaigns, each recipient can have their own quick landing page before the shopper is redirected to your storefront.
This is useful because the shopper immediately sees they are supporting the right cause, and it gives you a place to add last-minute guidance, like which products or collections they should order from.
The landing page is optional. If you leave it off, shoppers who scan the QR code go straight to your store, including the destination path if you set one above.
-
Turn on Enable Custom Landing Page per recipient.
-
Customize it with an optional recipient logo, headline, body copy, CTA text, and accent color.
-
Use it to confirm who the shopper is supporting and explain what products, collections, or special instructions apply to the fundraiser.
Customizable QR codes
Recipient QR codes are not just generated automatically. They can be branded for each recipient.
-
Pick a preset or custom QR code color.
-
Upload an optional QR code logo to place in the center of the code.
-
Save your changes, then download the finished QR code and hand it to the recipient for print, email, or social sharing.
Recipient setup goes beyond checkout
Each recipient can also have a public status page with fundraising progress, optional order details, and an optional leaderboard. That makes it easy to give each group a page they can monitor and share during the campaign.
6 Tag Fundraised Shopify Orders
OptionalAdd a GiveBack tag to Shopify orders after they are assigned to a fundraising recipient.
Order tagging helps you find, filter, and report on fundraised orders directly inside Shopify. When tagging is enabled for a campaign, GiveBack adds a namespaced Shopify order tag after an eligible order is matched to a recipient through the option list, custom code, or URL / QR code method.
If you do not enter a custom tag, GiveBack uses your campaign name. Tags are prefixed with
GiveBack:
so they are easy to identify in Shopify.
Use a short custom label when you want the Shopify tag to differ from the campaign name. GiveBack keeps the full order tag within Shopify's order tag length limit.
How to turn it on
-
Open your campaign settings and find the Shopify Order Tagging section.
-
Check Tag fundraised Shopify orders for this campaign.
-
Optionally enter a custom tag label. The final Shopify tag is shown on the campaign details page.
Shopify permission required
GiveBack needs Shopify's write_orders permission before it can add tags to orders. If the permission is missing, your dashboard will show a setup notice.
7 Track Your Campaign's Progress
Monitor donations and see how each recipient is performing.
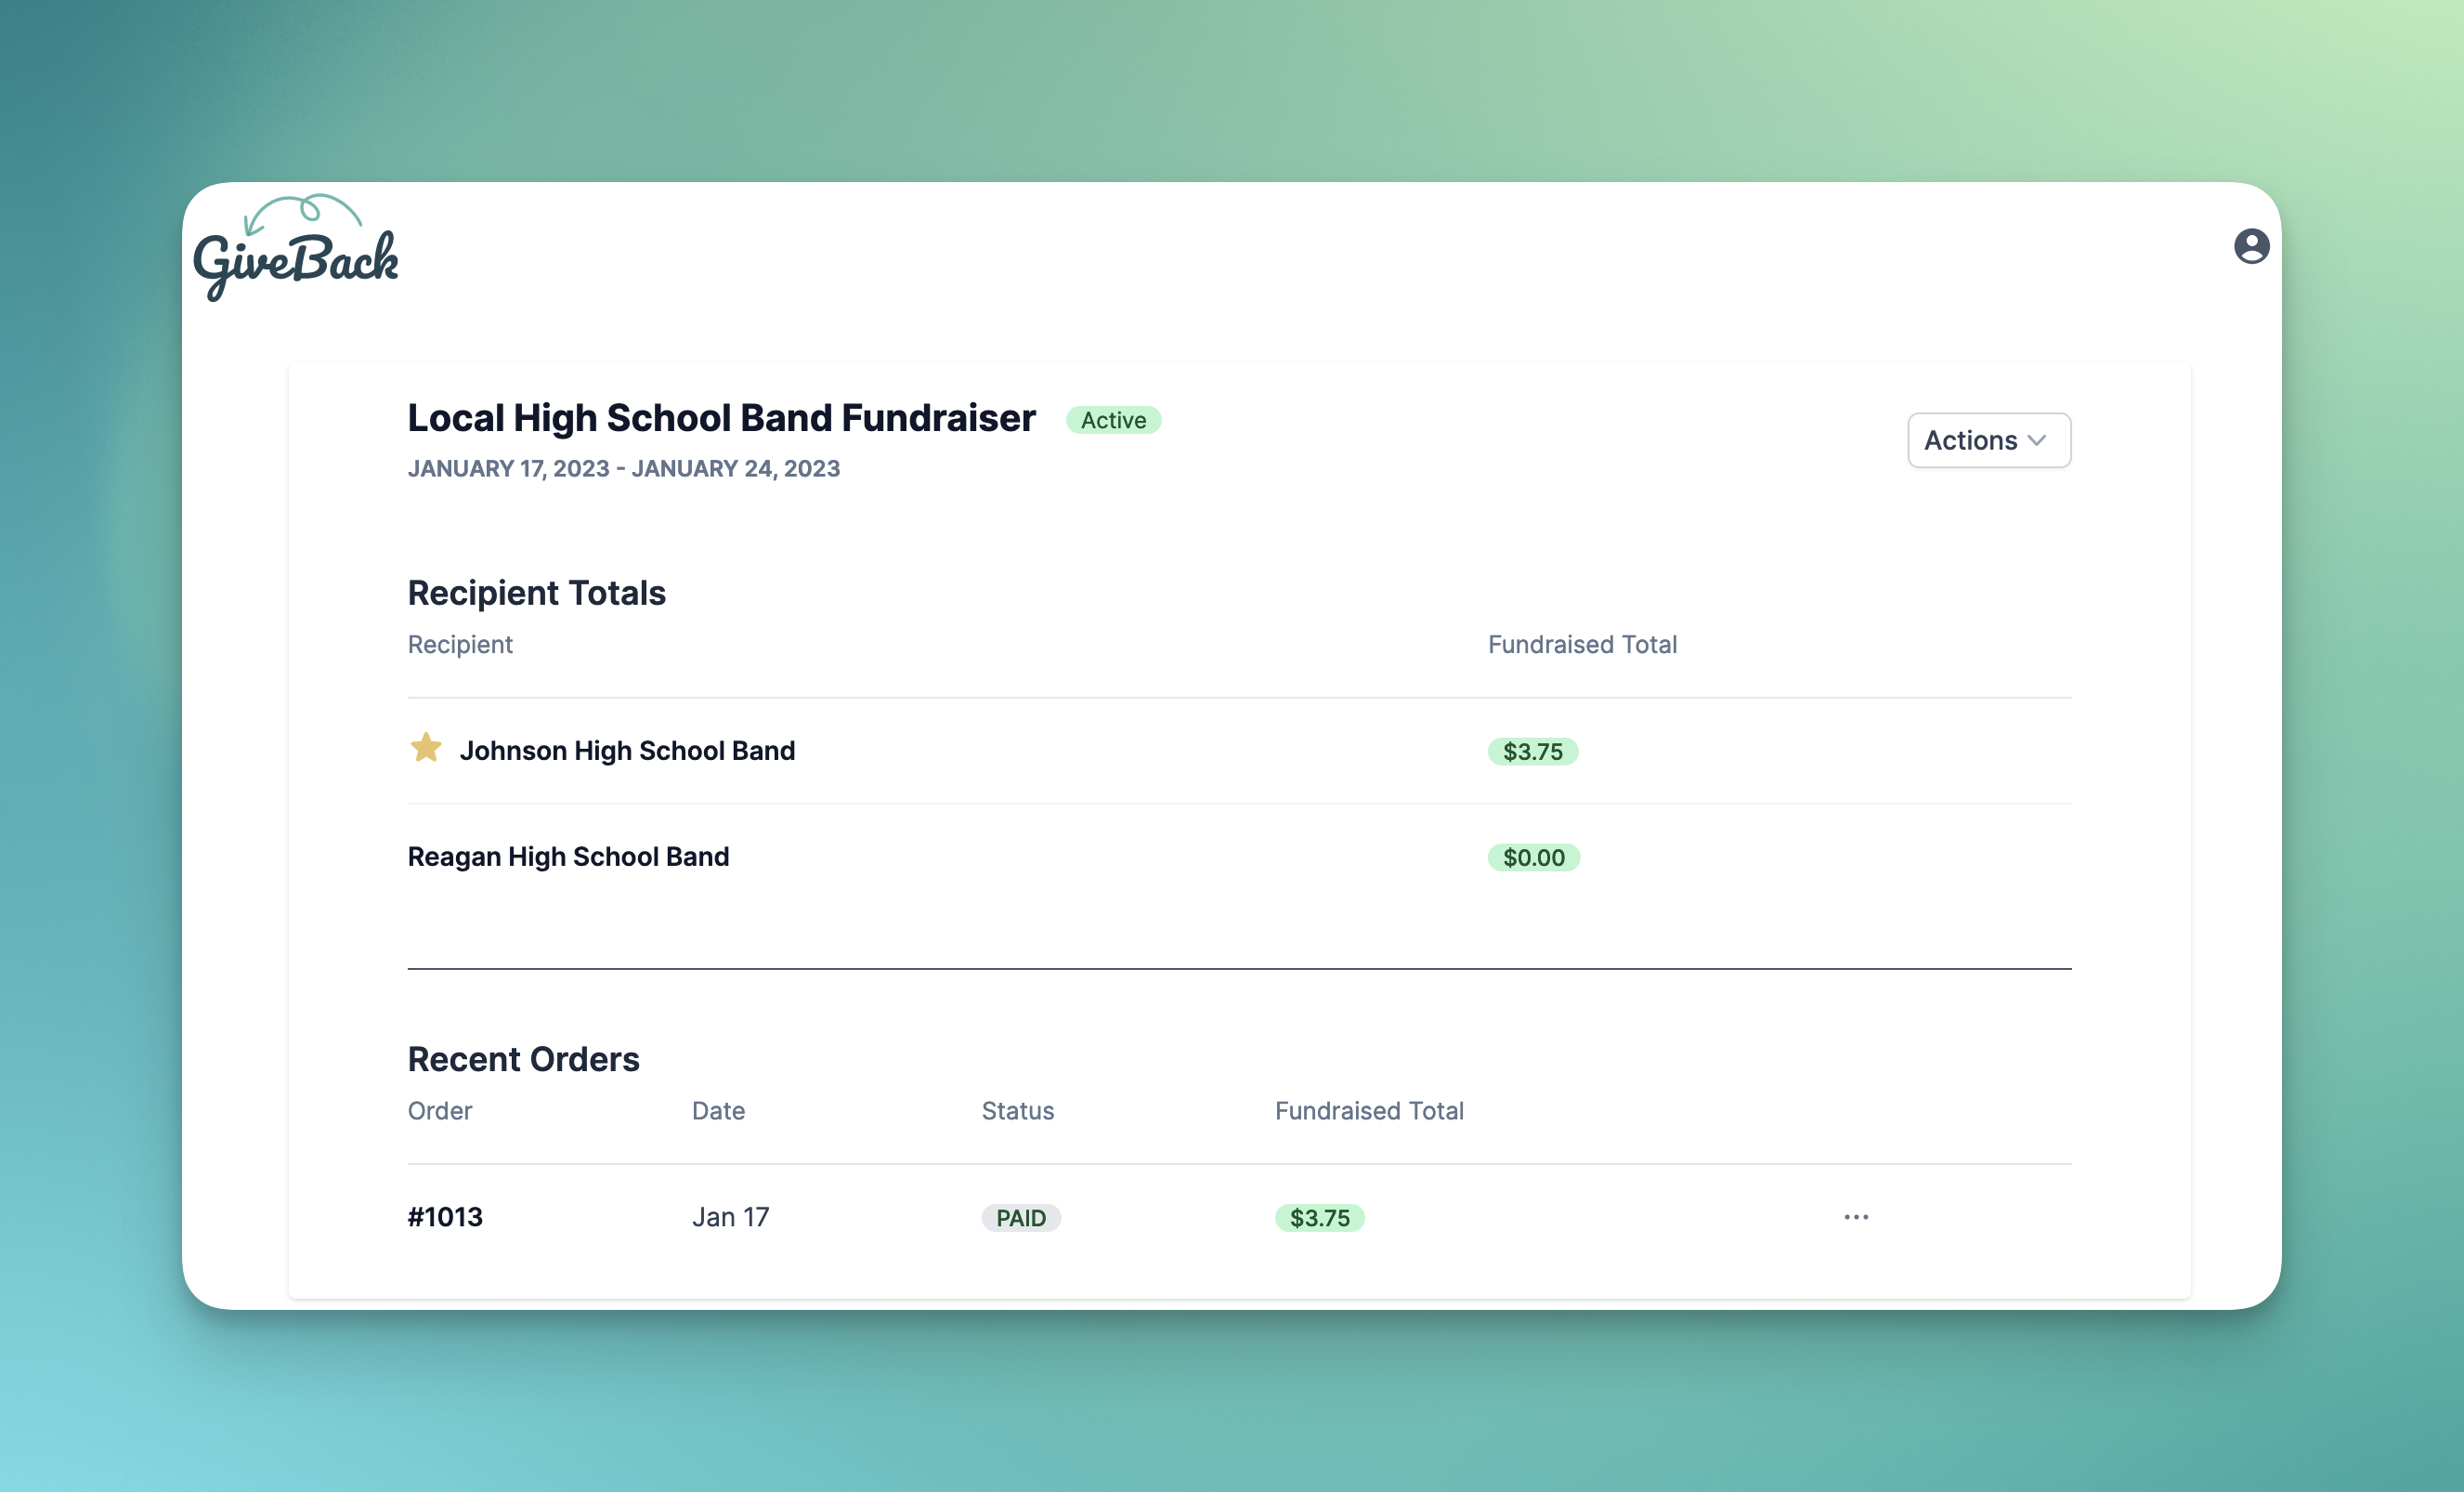
Once your campaign is live, your dashboard shows real-time stats including total donations, per-recipient breakdowns, and eligible orders. Use these insights to celebrate milestones and keep your recipients motivated.
Tips for a Successful Campaign
- Share recipient links — Give each recipient their unique URL or QR code to share with their community
- Post updates — Keep recipients informed about their progress to maintain momentum
- Celebrate milestones — Announce when you hit donation goals to generate excitement
Ready to make a difference?
Set up your first fundraiser in under 5 minutes. Turn every sale into an opportunity to give back.